
Hosting a clothing swap is one of the most satisfying parties you can throw. Everyone shows up with clothes they're tired of, and everyone leaves with something they actually want to wear.
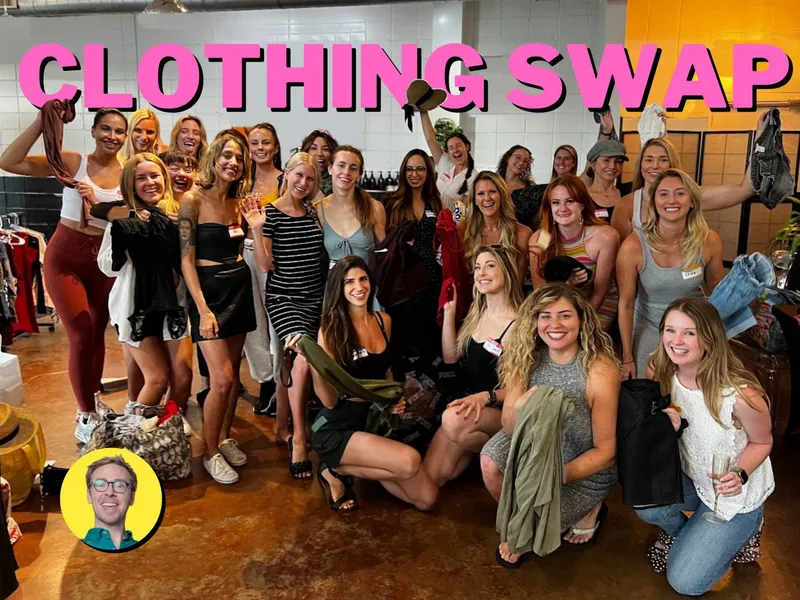
I attended a large women's clothing swap hosted by my friend Courtney in Austin, Texas. She had 35 guests, a system that actually worked, and a room that felt more like a boutique than a basement cleanout. Afterward I sat down with her to debrief everything she did right -- and what she would change next time.
In this article, you'll learn:
- How many items to ask guests to bring (and why getting this right matters),
- How to organize racks and tables so the room feels like a real shop,
- When to do the "fashion show" moment that makes everyone laugh and bond,
- How to run two icebreakers that help guests actually connect,
- What to do with all the leftover clothes at the end, and
- The part of the clothing swap that usually goes wrong (probably not what you think).
Why you should trust me: My friend Courtney recently organized a HUGE clothing swap for 35 of her friends. I attended it and then interviewed her about it afterward. I've personally hosted hundreds of networking events and cocktail parties. New York Magazine once called me a host of "culturally significant" parties. But don't just take their word for it. Keep reading to see my clothing swap party tips.
How to Host a Clothing Swap Video
Here's a video that I made when I attended a large women's clothing swap recently.
What is a Clothing Swap?
A clothing swap is a gathering where guests bring clothes they no longer wear and leave with new-to-them pieces from other people's closets.
No money changes hands. Nobody shops online at midnight. The whole thing is free, and it's genuinely fun. You get a refreshed wardrobe, you help friends do the same, and you clear out the pile of things sitting unworn at the back of your closet.
I've found that clothing swaps work for a wide range of group sizes -- from eight close friends in a living room to 35 women at a proper event with garment racks and name tags. The format scales well as long as you plan for it.
How Many Items Should Guests Bring?
This is the question I get wrong most often in my invitations, and it's easy to fix. Ask each guest to bring 5 to 10 items. That range works for almost any group size.
- Five items is the minimum. Below that, the racks look sparse and guests feel like they don't have enough to browse. It also creates an awkward dynamic where a few people bring a lot and others bring almost nothing.
- Ten items is a generous contribution. It keeps the selection full and exciting. For a 15-person party, that means potentially 150 items in circulation -- which feels like an actual shopping experience.
- Put the number in the invitation. Don't say "bring some clothes you want to swap." Say "bring 5 to 10 items in good condition." Specificity helps people show up prepared.
- Specify quality upfront. "New or gently used" in the invite saves you from getting threadbare bathrobes or things with mystery stains. I've seen it happen.
Also ask guests to run their items through the dryer before the event. It freshens everything up and makes the whole room smell better.
The Essential Clothing Swap Checklist
Start planning at least two to three weeks before your event. Here's the timeline I follow:
2 to 3 weeks before:
- Decide on your guest list and venue
- Set clear guidelines for what to bring: 5 to 10 items, new or gently used, and optionally a theme
- Send invitations and collect RSVPs (more on this below)
1 week before:
- Send reminder messages with a photo of something fun you'll have at the swap
- Gather supplies: hangers, garment racks, signs, mirrors
- Identify a local donation center for leftover items
Day before:
- Set up your space with display areas and a dedicated changing spot
- Prepare refreshments and any decorations
- Put out some of your own items as "starter stock" so racks don't look empty when the first guests arrive
Supplies You Need
Here's what I tell every host to have ready:
- Hangers -- about 10 per person, so roughly 100 for a 10-person party
- Name tags and Sharpie markers
- Collapsible garment racks (see recommendations below)
- Full-length mirrors -- at least two
- Trash bags for the donation pile at the end
- Water, wine, snacks, napkins
Garment Racks and Hangers
Racks and hangers are the thing that separates a clothing swap that feels like a party from one that feels like a yard sale. When clothes are hanging up and organized, guests browse longer and find more things they love.
Ask friends if they have portable clothing racks you can borrow. Or buy a couple of collapsible racks -- they're cheap and you'll use them again. Aim for:
- 2 to 3 clothing racks for every 10 participants
- 10 hangers per person
- Racks organized by category (more on this in the next section)
I like these collapsible clothing racks on Amazon:
- SimpleHouseware Standard Rod Garment Rack
- Simple Houseware Standard Double Rod Garment Rack
- Simple Trending Standard Clothing Garment Rack
How to Organize Racks and Tables by Category
This is one of the things Courtney did that made her swap feel like a real boutique. She organized everything by category before guests started browsing. It sounds simple, but it changes the whole experience.
Here's the layout I recommend:
- Tops rack. T-shirts, blouses, tanks, sweaters. Hang them all together, sorted by color within the category if you want an extra boutique feel.
- Bottoms rack. Jeans, pants, skirts, shorts. If you have a double-rod rack, bottoms fold well over the lower bar.
- Dresses rack. Keep these separate. Dresses are usually the most popular category and deserve their own dedicated space.
- Accessories table. Bags, scarves, jewelry, belts, and shoes go on a flat surface. Use jewelry stands if you have them. Arrange bags upright rather than piling them in a bin.
- Outerwear rack. Jackets and coats, if your group is bringing them. These are bulky, so give them room.
Put simple handwritten signs on each rack. You can write them on index cards and tape them to the rack. Guests shouldn't have to figure out where to look -- make it obvious.
If you don't have enough racks, use tables for folded items. Lay out jeans folded flat, stack sweaters by color. It works fine. Shoes and accessories almost always go on a table anyway.
Changing Room and Mirrors
Your guests will want to try things on. Have a changing area ready. A bathroom works, a bedroom works, or you can use a foldable room divider to create a privacy corner in any room.
Put at least two full-length mirrors near the racks so people can do a quick check without going to the changing room every time. Most people will hold things up and look at themselves first, then only use the changing area for things they're seriously considering.
Sending Invitations
Send invitations at least two weeks before the event. I call this the party runway -- it gives people enough time to clear their schedules and actually go through their closets.
A simple first-touch text works well:
Hi! I'm getting some girls together to host a clothing swap in two weeks. Can I send you more info? It will be on Tuesday night, Aug 16, from 6-9 PM. LMK if you're free!
Once they say yes, follow up with the full details -- including the ask to bring 5 to 10 items in good condition. That prompt gives people time to actually sort through their closets rather than grabbing whatever is on the floor.
Collecting RSVPs
Use a free online event platform like Partiful, Paperless Post, or Mixily to collect RSVPs. Having people commit to attending -- rather than just saying "sounds fun!" -- makes a big difference in who actually shows up.
These are the free platforms that I currently like and recommend.
In the event description, include:
- The ask to bring 5 to 10 items of new or gently used clothing
- A note to run items through the dryer beforehand
- Any theme (if you have one)
- Whether to bring hangers
The more specific you are, the better your guests will prepare. Vague invitations produce vague results.
Reminder Messages
I feel strongly about reminder messages. They are one of the most important things a host can do to ensure good attendance. I wrote a detailed article on party reminder messages if you want the full breakdown.
Here's the schedule I recommend for a clothing swap:
- Seven days before: Send a short reminder with logistical info and a fun image of some of the clothes you'll have at the party. This builds anticipation.
- Three days before: Remind guests to pull their items together. If guests don't already know each other, this is a great moment to share a short guest list with a line about each person. It gets people excited and dramatically improves attendance.
- Morning of the party: Send a final reminder. Put the address and your phone number at the top.
Grab the free 2-page party checklist.
Fair Swapping Systems
The part of the clothing swap that goes wrong most often is fairness -- specifically, someone who brought nothing grabbing the best pieces before people who contributed a lot have a chance to browse. Here's how to handle it by group size:
- Smaller groups (5 to 10 people). A simple one-for-one exchange works well: take the same number of items you bring. Easy to enforce and keeps things balanced.
- Medium groups (10 to 20 people). Consider timed rounds where everyone gets 10 minutes to select one or two items per round. This gives everyone a fair first pass before open browsing begins.
- Larger groups (20 or more people). A token system works best here. Give each person tokens based on how many items they brought, and they spend those tokens to take items. Each item can be worth one to three tokens depending on condition.
Whatever system you use, explain it at the start of the party. Don't assume people will figure it out on their own.
How to Level Up Your Clothing Swap Party
Courtney got great feedback after her swap. Most of her guests asked immediately: "When's the next one?" Here's what she did that made people want to come back.
Name Tags
Give everyone a name tag when they arrive. Name tags are one of the cheapest and highest-impact hosting tools available. They make it easier for guests to introduce themselves, start conversations, and remember each other afterward.
This is a key element for all of the events that I organize. Read about how and why you should use name tags in Chapter 5 of my book, The 2-Hour Cocktail Party. Or check out this article with all the key lessons.
Two Icebreakers
Do two icebreakers at your clothing swap: one at the start and one about an hour in. This is what Courtney did, and it was one of the highlights of the event.
The first icebreaker, after everyone arrives:
- Say your name,
- what you do for work, and
- what you like to do for fun.
The second icebreaker, about an hour later:
- Say your name,
- show one thing you found at the swap, and
- name one more item you're still looking for -- a summer dress, a specific color sweater, whatever it is.
That second prompt is smart. After someone says "I'm still looking for a black blazer," three other guests immediately know something useful about them and have a reason to go talk. Read more about how to run icebreakers on the site.
The Fashion Show Moment
This is the moment I most recommend adding to your swap. At some point around 7:30 or 8:00 PM, gather everyone and invite guests to model something they found. No pressure, but most people love it.
A few things that make it work:
- Do it in the second half of the party. People need time to find something good before they're ready to show it off. Plan this around 90 minutes in.
- The host goes first. Model something yourself to break the ice. Once one person does it, others follow quickly.
- Keep it casual. Don't make it a formal judged event. Just have people walk out, spin around, and say what they found. The silliness is the point.
- It generates great conversation. When someone shows a piece, the person who donated it often says "I bought that in Italy in 2019!" Suddenly there's a story and a connection.
This is the part of the swap that guests mention when they text you the next day. Don't skip it.
Optional Themes
A themed swap often means better contributions and more useful finds for everyone. Consider:
- Seasonal refresh. Focus on the upcoming season. Ask people to bring what they won't need for the next six months.
- Workwear exchange. Professional clothes for office settings. Great for groups transitioning into or out of corporate life.
- Special occasion. Formal wear and party outfits. Perfect if your group has a lot of weddings and events coming up.
- Accessories only. Jewelry, scarves, bags, and belts. Works well as a smaller add-on to a regular party.
Food and Drinks
Keep the food simple. You want finger foods that won't stain the clothes and drinks that are easy to hold while browsing. Self-serve stations work best -- guests can grab what they need without waiting for you to play bartender.
Upbeat background music, comfortable seating for breaks, and decent lighting in the browsing area go a long way toward making the room feel like a fun place to be, not just a transaction.
Hangers One More Time
I keep coming back to hangers because they matter more than people expect. Guests who walk into a room with clothing hanging organized on racks behave differently than guests who walk into a pile. They slow down, browse carefully, and find more things they actually want.
Choosing the Right Venue
Your venue needs: enough floor space for garment racks, good lighting, at least one area for guests to try things on, and a spot where people can sit with a drink and talk.
- Home setting. Works well for 8 to 15 people. Designate your living room for clothing display, a bathroom or bedroom corner as the changing area, and the kitchen for food and drinks. Free to host.
- Larger venues. For 15 or more people, look at community centers, co-working spaces, or a rented event room. Churches and local coffee shops sometimes offer space for community events as well.
Clothing Swap Party Agenda
For a swap running 6:00 PM to 9:00 PM, here's what I recommend:
- 6:00 PM -- Welcome, name tags, guests hang up their items
- 6:30 PM -- First icebreaker: name, work, hobbies
- 6:40 PM -- Host intro speech and swap rules
- 6:45 PM -- Open browsing and mingling
- 7:25 PM -- Group photo
- 7:30 PM -- Fashion show moment: model something you found
- 7:45 PM -- Second icebreaker: show a find, name one item still wanted
- 8:00 PM -- More browsing and mingling
- 8:15 PM -- Announce final browsing window
- 8:45 PM -- Thank everyone, begin cleanup and donation pile
- 9:00 PM -- The end
When guests arrive, greet them at the door and hand them a name tag. Ask them to hang their items on the appropriate rack right away -- it gets them engaged immediately and keeps the logistics moving. Once everything is up, encourage people to grab a drink and start browsing.
When you give your intro speech at 6:40, explain the swapping rules clearly. How many items can people take? Is there a token system? People won't read a sign -- they need to hear it from you.
What to Do with Leftover Clothes
There will always be items left at the end. Plan for this before the party starts.
- Identify a donation center in advance. Women's shelters and community programs are great options. Knowing where the clothes are going makes guests feel good about leaving things behind.
- Keep a few high-quality pieces as starter stock. Save them for your next swap so the racks aren't empty when guests arrive.
- Have trash bags ready. At the end of the party, quickly sort what's being donated and what's going in the textile recycling pile. It takes ten minutes and leaves your space clean.
- Let guests take one last pass. Announce at 8:15 that the party is winding down and everything left over is going to donation. Often guests grab a few more things they were on the fence about.
Common Challenges and How to Handle Them
- Size variety. Not every item will fit every guest. Encourage accessories and pieces that work across sizes. If your group has a wide range, consider creating separate sections labeled with size ranges.
- Low-quality items. Set the standard clearly in your invitation: new or gently used, no stains or damage. If something arrives that doesn't meet the standard, quietly set it aside in the donation bag rather than putting it on the rack.
- Not enough changing space. Tell guests in advance to wear form-fitting basics so they can try things on over what they're wearing. A simple tension rod with a curtain can create a privacy corner anywhere.
- Someone who didn't bring anything. This happens. The fairest fix is a light token or ticket system for the first 30 minutes, where each person can select three to five items. After that, it opens up to free browsing.
Frequently Asked Questions
Do guests have to bring the same number of items they take?
Not necessarily, but it's a good guideline to communicate in advance. For small groups, a rough one-for-one exchange keeps things fair. For larger groups, the token system handles this automatically. The main thing to avoid is having guests take ten items after bringing two -- that creates resentment fast.
Is a clothing swap just for women?
Most clothing swaps I've seen are women-only events, but there's nothing stopping you from hosting a co-ed swap or a menswear-focused one. The key is to be clear in your invitation so guests know what to bring. Mixed swaps work best when you have enough people in each category to make the selection feel worthwhile for everyone.
How do I handle it if someone brings something in bad condition?
Be clear in the invitation about the standard you expect -- "new or gently used, no visible stains or damage" is enough. If someone brings something that doesn't meet the bar, you can quietly put it in the donation bag instead of on the rack. Most people won't even notice. The embarrassment of pointing it out publicly is never worth it.
What if there are too many clothes left at the end?
This is actually a good problem. Announce around 8:15 that everything left is going to donation, and let guests take one more pass. Then pack the remainder into bags and drop them off the next day. I recommend identifying your donation spot before the party -- it makes the end-of-night cleanup faster and gives the leftover clothes a clear destination.
Conclusion
A clothing swap is one of the easiest parties to host well. Everyone comes with something to contribute, everyone leaves with something new, and the whole thing costs almost nothing to put on.
The details that make it work: ask for 5 to 10 items per person, organize the racks by category, do two icebreakers, and add a fashion show moment in the second half. That's really the whole formula.
Key takeaways:
- Ask guests to bring 5 to 10 items, new or gently used, run through the dryer
- Organize racks by category: tops, bottoms, dresses, accessories
- Do two icebreakers and a fashion show moment around 7:30 PM
- Explain the swapping rules out loud at the start -- don't rely on signs
- Plan your donation dropoff before the party so end-of-night cleanup is fast
Clothing swaps are just one way to bring people together. I wrote a book about how small, well-hosted gatherings can build real friendships and even change your career. It's called The 2-Hour Cocktail Party. Check it out here or read the reviews on Amazon.
Have you ever hosted a clothing swap? What made it work? Send me an email with your suggestions and I'll update this article.